
Through the first four parts of this series, we have successfully built and customized our personal blog. However, as it stands, this blog only exists within your local machine (localhost:1313).
Now, it’s time to take this project to the world. We will upload the source code to GitHub and use a service called Cloudflare Pages to deploy it as a live website that anyone can access.
I will be using Cloudflare to apply a custom domain. Please note that if you are using GitHub Pages, Netlify, or Vercel, some steps and configurations might vary slightly.
1. Creating a GitHub Repository#
First, you need a GitHub Repository to store your blog’s source code safely and act as the core for deployment.
- Log in to GitHub and click New Repository.
- Choose a repository name (e.g.,
my-blog) and create it. - Copy the Repository URL that appears on the screen (e.g.,
https://github.com/GOODJINC/my-blog.git).
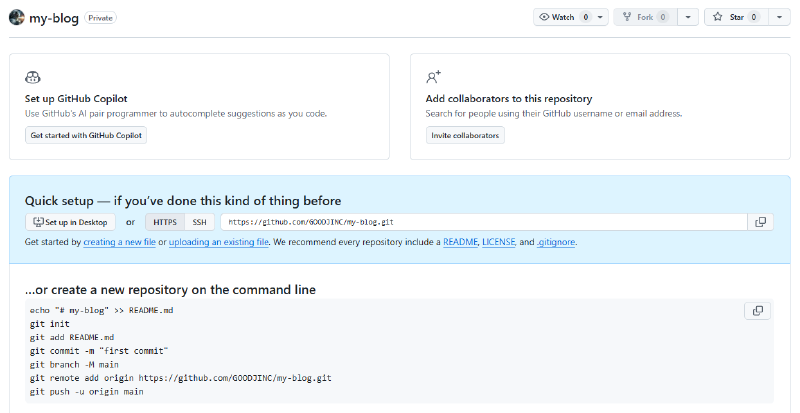
[ID].github.io domain provided by GitHub Pages without a custom domain, set the Visibility to Public. Since I plan to apply a custom domain, I set mine to Private.As this is my first blog and I’m still running several tests, I haven’t made the source code public yet. I plan to switch the repository to Public once things are more organized.2. Uploading Local Source Code#
Now, it’s time to move the blog files from your computer to GitHub.
① Check .gitignore#
When uploading to GitHub, you don’t need to include the public folder—which contains the final generated site. This is because Cloudflare will build the site directly on its servers.
If you don’t have a .gitignore file, create one in the root folder and add the following lines:
public/
resources/_gen/
.hugo_build.lockpublic folder. Be careful as .gitignore configurations can vary depending on the service you use.② Uploading via Git Commands#
Open your terminal in the root folder and enter the following commands in order:
git add .
git commit -m "First commit: Hugo blog with Blowfish theme"
git branch -M main
git remote add origin [Your copied Repository URL]
git push -u origin main
After this, visit your GitHub repository to verify that the files have been uploaded correctly.
3. Connecting Cloudflare Pages to GitHub#
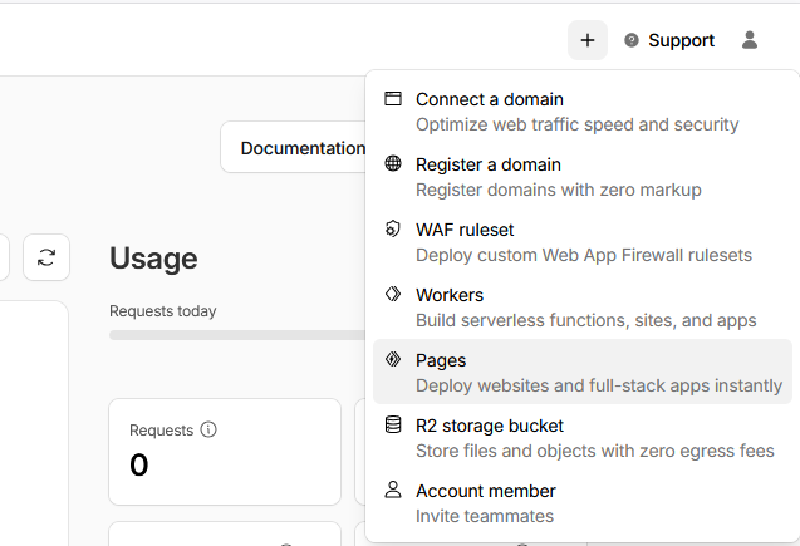
Next, we need to configure Cloudflare to detect the code on GitHub and automatically build the website.
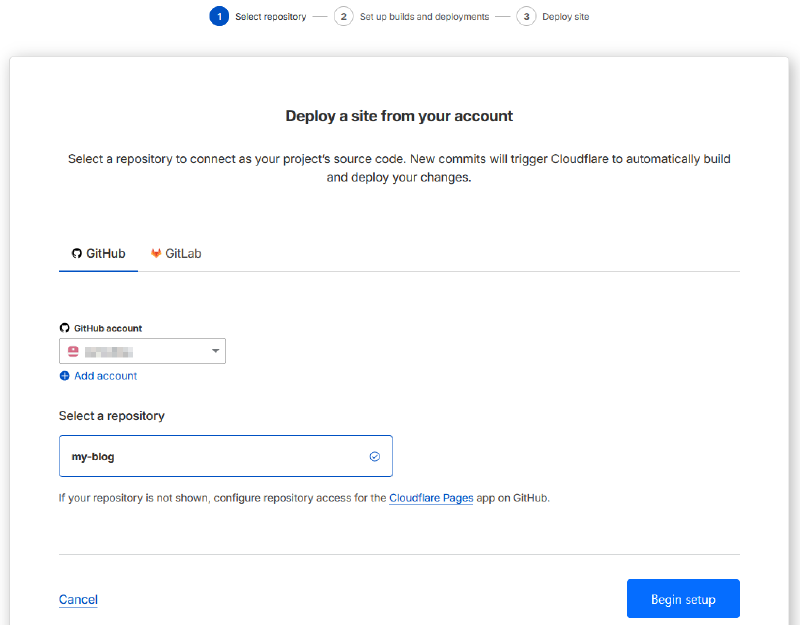
① Log in to the Cloudflare dashboard. Click the Add (+) icon in the top right corner and select Pages.
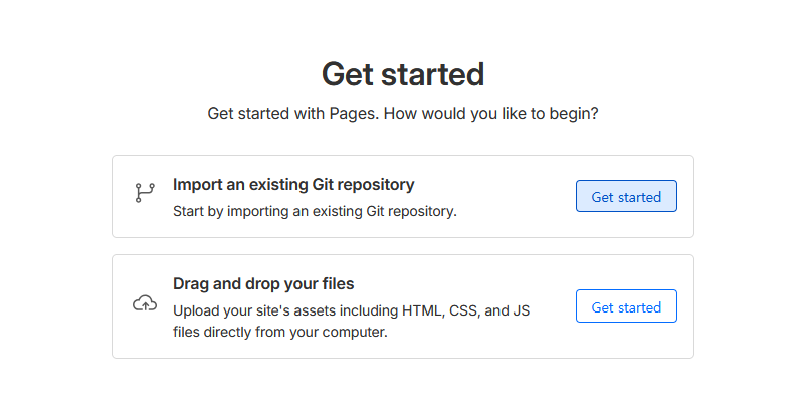
② Select Import an existing Git repository. (We use this method since our repository is already on GitHub.)
③ Follow the prompts to connect your GitHub account and authorize access to your blog repository.
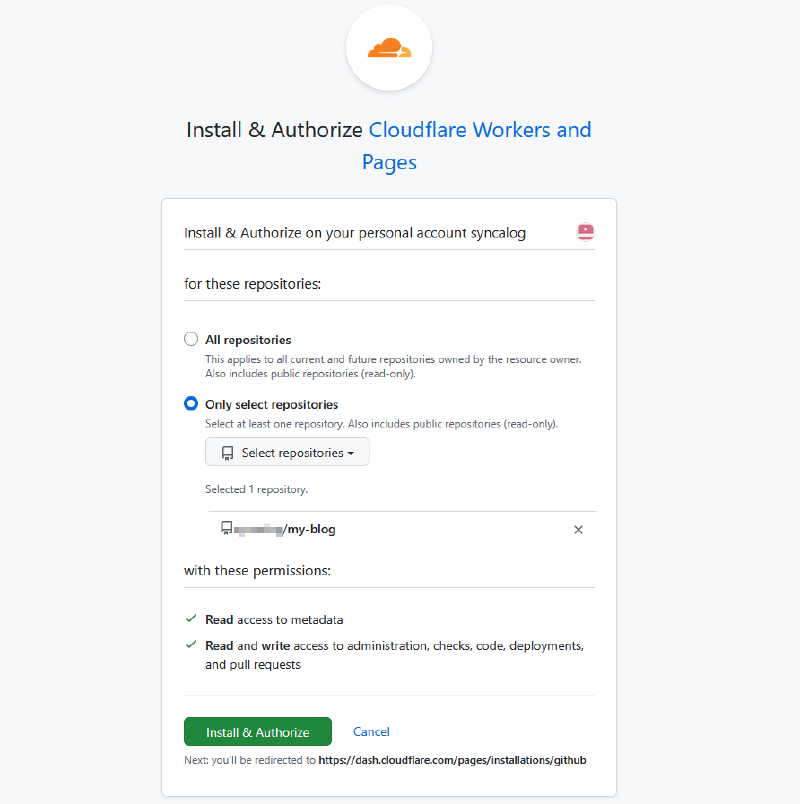
④ Select the repository you just connected and click Begin Setup.
4. Build Settings#
This is the most critical step. Ensure the following details are entered accurately to avoid build errors:
Framework preset: Hugo
Build command: hugo –gc –minify
Build output directory: public
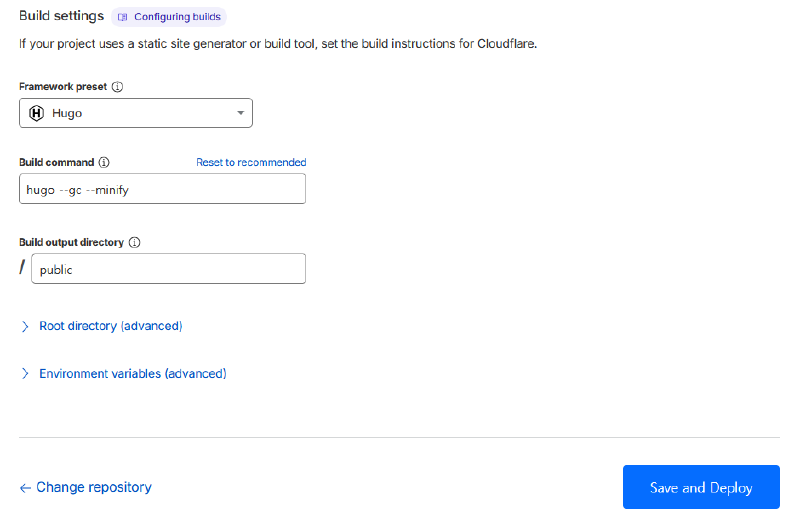
Once all settings are configured, click Save and Deploy.
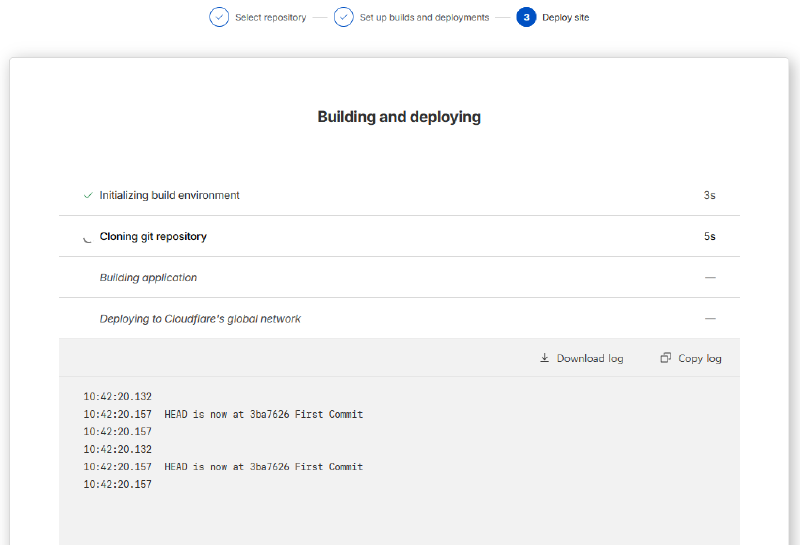
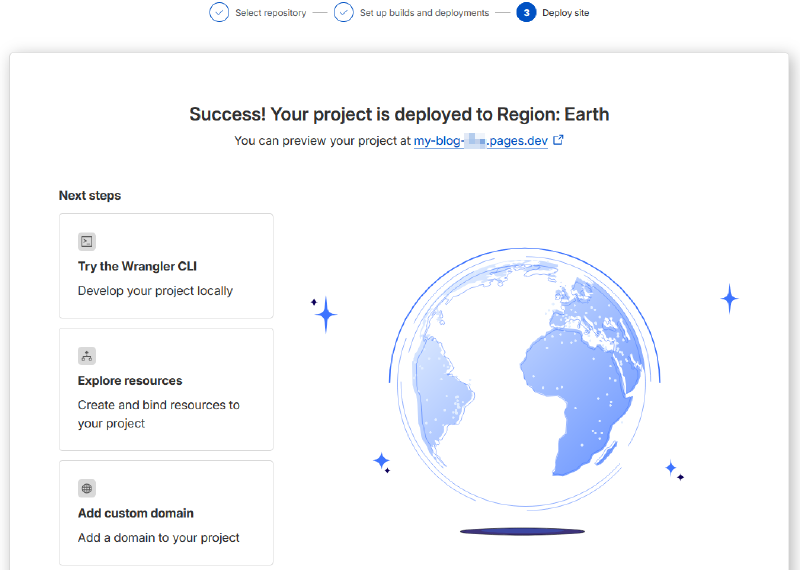
Wait a few moments for the build to finish. Once successful, you will receive a default URL where you can access your live blog.
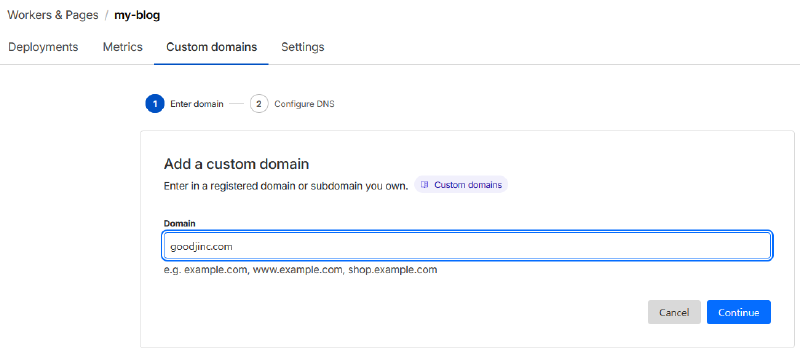
5. Connecting a Custom Domain (goodjinc.com)#
Upon deployment, you are assigned a default address like my-blog.pages.dev. To establish a professional blog, it’s recommended to link a custom domain.
① In your Cloudflare Pages project view, navigate to the Custom domains tab.

② Click Set up a custom domain and enter your domain name (e.g., goodjinc.com).
③ Authorize Cloudflare to update your DNS records automatically, and the process will be complete.
While there are many services to purchase and manage domains, I personally use Hosting KR for my domain management.
6. Closing#
Your personal blog is now live and accessible to everyone!
From now on, whenever you write a new post on your PC and run git push, Cloudflare will automatically detect the changes and redeploy your blog globally within minutes.
While the deployment is finished, there is still one more task. We need to make sure your posts appear in Naver or Google search results.
In the final part of this series, we will look into Search Engine Registration (Google/Naver) and Connecting Google Analytics.